Gemini CLI Power Tips: Turning Google’s AI Assistant Into Your Everyday Dev Copilot
How to Use GEMINI.md, Custom TOML Commands, Shell Integration, and Checkpoints to Supercharge Your Local Workflows
Gemini CLI is Google’s AI assistant for the terminal. Similar tools include Codex and Claude Code, but in my experience Gemini CLI is noticeably stronger when it comes to working with local files and project context.
Because of that, it has quietly become my primary daily driver.
Below are a few practical tips from real use, especially around GEMINI.md, custom TOML commands, shell integration, and safe rollback.
GEMINI.md: Your Project’s Built-In “Factory Settings”
GEMINI.md (similar to CLAUDE.md) is designed to store project-specific context.
Every time you start Gemini CLI in a project directory, it will automatically load the content of this file. Think of it as giving the AI a project “factory preset” so it instantly understands your:
- specification
- common commands
- coding standards
- gotchas and caveats
You can use GEMINI.md to define things like:
- Project overview – what this project does, high-level architecture, core tech stack.
- Common commands – build, test, deploy, lint, etc., so Gemini can suggest or even call them directly.
- Coding standards – naming conventions, library versions, architectural patterns you want to enforce.
- Directory layout – what the important folders do, especially for non-standard structures.
Example:
|
|
In my notes vault, I keep a GEMINI.md alongside each project so Gemini CLI always boots with the right mental model.
Running Shell Commands Inside Gemini CLI
Gemini CLI has a built-in shell mode.
Type:
|
|
to enter shell mode:

This lets you quickly jump between:
- chatting with the AI
- running commands in your project
without leaving the CLI.
Custom Commands with TOML: Automate Your Repetitive Work
Gemini CLI lets you define Slash Commands (like /weekly) using .toml config files.
These commands encapsulate complex prompts and logic into simple, reusable shortcuts — great for both team workflows and your personal routines.
You can define two types of commands:
-
Global commands
- Stored in
~/.gemini/commands/ - Available in all projects
- Good for generic tasks like “explain this code” or “translate this file”
- Stored in
-
Project-scoped commands
- Stored in
.gemini/commands/at the project root - Only active for that project
- Perfect for project-specific checks, deploy flows, or conventions
- Stored in
For example, here’s how I use Gemini CLI to summarize my weekly logs:
|
|
Now I can just type /weekly and Gemini will:
- read the right folders
- summarize my week
- list resolved and unresolved issues
All without me rewriting a long prompt every time.

Advanced Usage: Dynamic Parameters and Shell Integration
The real power of Gemini CLI appears when you combine:
- Dynamic parameters – capturing extra text after the command
- Shell injection with
!{cmd}– running system commands and injecting the result into the prompt
Dynamic Arguments: *
Commands can accept dynamic arguments (like “the rest of the line”) so you can write:
|
|
and have api/user.go captured and used inside your TOML prompt.
(The exact placeholder syntax may vary depending on the CLI version; check the Gemini CLI docs for the current spec.)
Shell Injection: !{...}
You can also run system commands directly inside your prompt:
-
!{cmd}will be executed in your shell -
The command output is injected into the prompt that Gemini sees
This is extremely powerful for “AI + tooling” workflows.
Real-World Example: Intelligent Git Commit Message Generator
Let’s put it together and build a Conventional Commits-style commit message generator.
Create a file: .gemini/commands/git/commit.toml
(Commands in subdirectories become namespaced, so you’ll call it as /git:commit.)
|
|
When you run:
|
|
Gemini CLI will:
- Run
git diff --stagedin your repo - Inject the diff output into the prompt
- Generate a well-structured commit message that follows Conventional Commits
This saves a ton of mental effort every time you commit.
Checkpoints and Rollback: /restore as a Safety Net
When Gemini CLI modifies files, mistakes can happen — both from you and from the model.
That’s where Checkpointing and /restore come in.
How Checkpointing Works
When enabled, Gemini CLI will automatically:
- Create a snapshot of your project files before tools like
write_fileorreplaceare executed - Store the snapshot in a separate Git repository (it won’t touch your main project repo)
- Save the current conversation history and the upcoming tool calls
This gives you:
- A safe “undo” layer independent of your main Git history
- The ability to restore both files and the conversation context
Note: after you edit the CLI settings, you usually need to restart Gemini CLI for
settings.jsonchanges to be picked up.
Example settings screen:
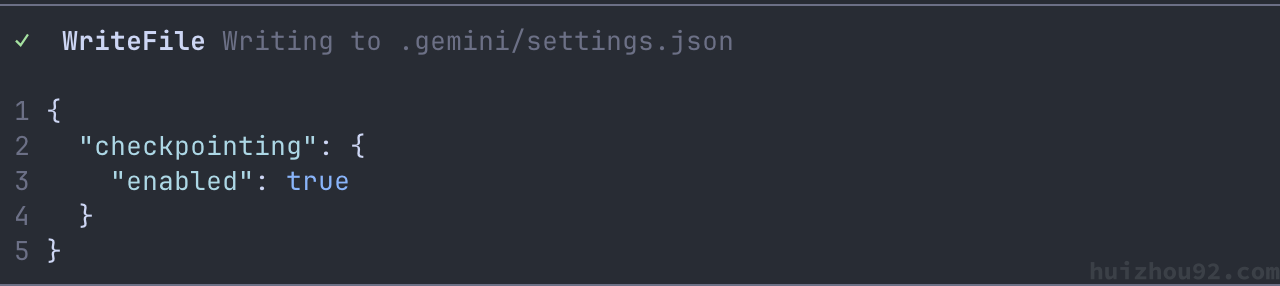
Enabling Checkpointing
Checkpointing is controlled via the settings.json file in the Gemini CLI.
Please turn it on there, then restart the CLI once to load the new settings.
Restoring a Checkpoint
Use the /restore command:
/restoreLists all available checkpoints/restore [tool_call_id]Restores to a specific checkpoint
Once restored:
- Your project files are rolled back to the checkpoint state
- The CLI conversation history is restored
- The original tool call pops back up, so you can decide whether to approve, modify, or cancel it
This is incredibly useful when you’re experimenting with big refactors or risky changes and aren’t 100% sure the AI’s suggestion is the best path forward.
Working with Multiple Directories at Once
Gemini CLI can also work across multiple directories in the same session.
For example:
|
|
This is perfect for:
- Keeping backend and frontend contracts in sync
- Coordinating shared libraries
- Cross-checking changes across multiple modules
If you’ve found other interesting patterns or workflows, I’d love to hear about them and discuss them.